Blog

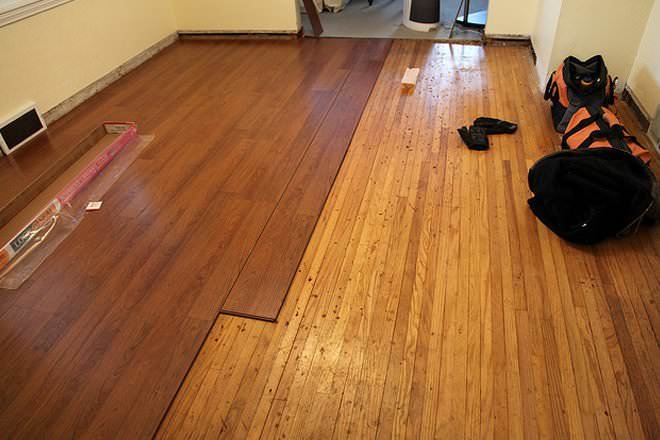
  • Hardwood vs Laminate Flooring: Pros, Cons, Costs

    Hardwood vs Laminate Flooring: Pros, Cons, Costs

    Introduction

    The hardwood vs laminate flooring decision trips up a lot of homeowners, mostly because laminate has gotten so good at mimicking wood that the visual difference barely matters anymore. What actually matters is cost, durability, and how much upkeep you’re willing to deal with over the years. I’ve lived with both in different homes, and honestly, my opinion has shifted over time — laminate used to feel like a compromise, but it’s genuinely competitive now. This guide breaks down the real trade-offs so you can pick what fits your budget and lifestyle in 2026.


    1. Upfront Cost Differences

    This is usually the deciding factor for most buyers, and the gap between the two is significant.

    Quick answer: Laminate flooring generally costs ₹60-150 per square foot in India, while solid hardwood flooring ranges from ₹250-600 per square foot depending on wood type — making laminate roughly one-third to half the cost upfront.

    2. Durability and Lifespan

    Hardwood, when maintained properly, genuinely outlasts laminate by a wide margin.

    • Hardwood: can last 50+ years with periodic refinishing
    • Laminate: typically lasts 15-25 years before needing replacement
    • Hardwood can be sanded and refinished multiple times; laminate cannot

    I’ve noticed people underestimate how much refinishing extends hardwood’s life. It’s not a one-and-done purchase like laminate — it’s more of a long-term investment that pays off over decades.

    3. Moisture and Water Resistance

    This is where laminate genuinely struggles, and it’s worth taking seriously in a country with heavy monsoon humidity. [link to related plumbing problems guide here]

    Direct answer: Laminate flooring is significantly more vulnerable to moisture damage than hardwood, since water can seep into the core layer and cause swelling — making it a riskier choice for humid climates or monsoon-prone regions without proper sealing.

    4. Maintenance Requirements

    Picture a small business owner in Jaipur who installed hardwood in her boutique showroom — she now budgets for periodic refinishing every few years, which keeps the floor looking new but adds ongoing cost most laminate owners don’t have to think about.

    • Hardwood: needs periodic polishing, refinishing, and careful cleaning products
    • Laminate: low maintenance, just regular sweeping and occasional mopping
    • Avoid excess water on both, though laminate is more sensitive to it

    5. Look and Feel Underfoot

    Genuine hardwood has a warmth and texture that’s hard to fully replicate, even with high-quality laminate. That said, I’ll admit modern laminate visuals have closed the gap significantly — most guests probably wouldn’t notice at a glance.

    • Hardwood: naturally warm underfoot, unique grain patterns per plank
    • Laminate: consistent, uniform appearance across the entire floor

    6. Environmental Considerations

    Hardwood, if sustainably sourced, is a natural, biodegradable material. Laminate contains synthetic layers that are less environmentally friendly at end-of-life. Has this factored into your decision at all?

    7. Installation Complexity

    Laminate is generally easier and faster to install, often suitable for a motivated DIY homeowner. Hardwood installation typically requires skilled labor and more time.

    • Laminate: click-lock systems make installation relatively straightforward
    • Hardwood: requires precise fitting, sometimes nailing or gluing to subfloor
    • Laminate installation: usually 2-4 days for an average home
    • Hardwood installation: often 5-10 days depending on complexity

    8. Resale Value Impact

    Hardwood flooring tends to add more perceived value to a home than laminate, particularly in higher-end real estate markets. [link to related increase home resale value guide here] That said, well-maintained laminate rarely hurts resale value significantly either.


    Frequently Asked Questions

    Q1: Which is better for humid climates, hardwood or laminate? Hardwood generally handles humidity better than laminate, though both need proper sealing and moisture management in monsoon-prone areas.

    Q2: Is laminate flooring as durable as hardwood? Not quite — hardwood typically outlasts laminate significantly, especially with periodic refinishing, though laminate is more scratch-resistant day-to-day.

    Q3: Can laminate flooring be refinished like hardwood? No, laminate cannot be sanded or refinished. Once damaged or worn, it typically needs full replacement rather than restoration.

    Q4: Which option is more budget-friendly for a full home? Laminate is significantly more affordable upfront, making it the practical choice for budget-conscious renovations or rental properties.

    Q5: Does hardwood flooring increase home value more than laminate? Generally yes, particularly in premium real estate segments where hardwood is seen as a higher-end material.

    Q6: Is laminate flooring suitable for kitchens and bathrooms? Not ideal due to moisture exposure — vinyl or tile are generally better suited for these high-moisture areas than laminate.


    Conclusion

    The hardwood vs laminate flooring choice ultimately comes down to your budget and how long you plan to stay in the home. If long-term value and durability matter most, hardwood is worth the investment. If you need something budget-friendly and low-maintenance, laminate holds up well for most living spaces. Get samples of both before deciding — seeing them in your actual lighting makes the choice much easier.


    Suggested Image Alt Text:

    1. “Solid hardwood flooring in a renovated living room”
    2. “Laminate flooring planks installed in a bedroom”
    3. “Comparison of hardwood and laminate flooring textures”

  • Best Flooring for Pets: What Actually Holds Up

    Best Flooring for Pets: What Actually Holds Up

    Introduction

    Anyone who’s lived with a dog or cat knows flooring takes a beating you don’t fully appreciate until it’s scratched, stained, or smells faintly of something you can’t quite place. Finding the best flooring for pets isn’t about picking whatever looks nicest in a showroom — it’s about what survives claws, accidents, and muddy paws after a walk. I learned this after watching a friend’s beautiful engineered wood floor get scratched up within a year of adopting a large dog. This guide covers flooring options that genuinely hold up with pets in Indian homes, in 2026.


    1. Vitrified Tiles — The Practical Default

    Vitrified tiles are already popular in Indian homes, and they happen to work well for pet owners too.

    Quick answer: Vitrified tiles are among the best flooring for pets because they’re scratch-resistant, non-porous (preventing odor absorption), and easy to clean — typically costing ₹40-80 per square foot, making them both practical and affordable.

    2. Vinyl Flooring — Comfortable and Durable

    Vinyl has come a long way from being seen as a “cheap” option. Modern vinyl planks handle scratches well and offer a softer surface than tile, which matters for older pets with joint issues.

    • Scratch-resistant coating holds up well against claws
    • Softer underfoot than tile, more comfortable for pets to walk on
    • Costs around ₹60-120 per square foot depending on quality

    I’ve noticed vinyl also handles temperature better than tile, staying warmer in winter, which pets seem to appreciate too.

    3. Why Hardwood Isn’t Ideal for Pet Owners

    I’ll be honest here, even though it’s not the popular opinion — hardwood floors and pets don’t mix well, no matter how well-sealed the wood is. [link to related flooring comparison guide here]

    Direct answer: Hardwood flooring is generally not recommended for homes with active pets, since claws can scratch and dent the surface over time, and it doesn’t handle moisture from accidents as well as tile or vinyl alternatives.

    4. Laminate Flooring — A Middle Ground

    Laminate offers a reasonable compromise between cost and durability, though it’s not as resilient as vinyl or tile when it comes to moisture.

    • More scratch-resistant than hardwood, less than vinyl or tile
    • Avoid in areas prone to spills or accidents — moisture damages laminate over time
    • Costs around ₹50-90 per square foot

    5. Textured or Matte Finish Tiles for Grip

    Glossy tiles look elegant but can be genuinely dangerous for pets, especially older dogs or cats with joint issues. Slipping on smooth surfaces isn’t just uncomfortable — it can cause injury over time.

    Picture a small business owner in Jaipur whose senior dog kept slipping on polished marble flooring. Switching to matte-finish vitrified tiles in the main living area solved the problem within weeks.

    6. Area Rugs and Mats for Extra Grip

    Even with pet-friendly flooring, adding rugs in high-traffic areas provides extra traction and comfort, especially for older or smaller pets.

    • Choose washable, low-pile rugs for easier cleaning
    • Avoid rugs with loose threads that pets can chew or get caught in
    • Place near sleeping areas and entry points for added comfort

    7. Odor and Stain Resistance Matter More Than Looks

    Has this ever crossed your mind while flooring shopping — how a beautiful floor might look in six months after a few accidents? Non-porous materials like tile and vinyl resist staining and odor absorption far better than wood or laminate.

    • Non-porous surfaces prevent urine and liquid absorption into flooring
    • Easier to disinfect thoroughly compared to porous materials
    • Reduces long-term odor buildup significantly

    8. Balancing Aesthetics With Practicality

    You don’t have to sacrifice style entirely for pet-friendliness. Wood-look vitrified tiles or high-quality vinyl planks now mimic hardwood’s appearance closely, giving you the look without the durability concerns.


    Frequently Asked Questions

    Q1: What’s the most scratch-resistant flooring for dogs? Vitrified tiles and quality vinyl flooring both offer strong scratch resistance, significantly outperforming hardwood or laminate.

    Q2: Is hardwood flooring completely unsuitable for pet owners? Not completely, but it requires more maintenance and careful pet nail trimming to minimize scratches and damage over time.

    Q3: Which flooring is safest for older pets with joint issues? Matte-finish tiles or vinyl flooring with added traction work best, since glossy surfaces increase slip risk for pets with mobility concerns.

    Q4: How do I clean pet accidents on different flooring types? Tile and vinyl clean easily with standard cleaners; laminate and wood require quicker action and gentler cleaning to prevent moisture damage.

    Q5: Is carpet a bad choice for homes with pets? Generally yes — carpet traps odor, stains easily, and is harder to fully clean after accidents compared to hard flooring options.

    Q6: What’s the most budget-friendly pet-safe flooring option? Vitrified tiles typically offer the best balance of affordability, durability, and easy maintenance for most Indian pet-owning households.


    Conclusion

    Choosing the best flooring for pets comes down to prioritizing durability and easy cleaning over pure aesthetics — though thankfully, modern options let you have both. Vitrified tiles and vinyl flooring consistently perform best for scratches, accidents, and daily wear. If you’re renovating with pets in mind, skip the hardwood and lean toward these more practical options instead.


    Suggested Image Alt Text:

    1. “Dog resting on scratch-resistant vitrified tile flooring”
    2. “Vinyl plank flooring in a pet-friendly living room”
    3. “Matte-finish tiles providing grip for pets in home”
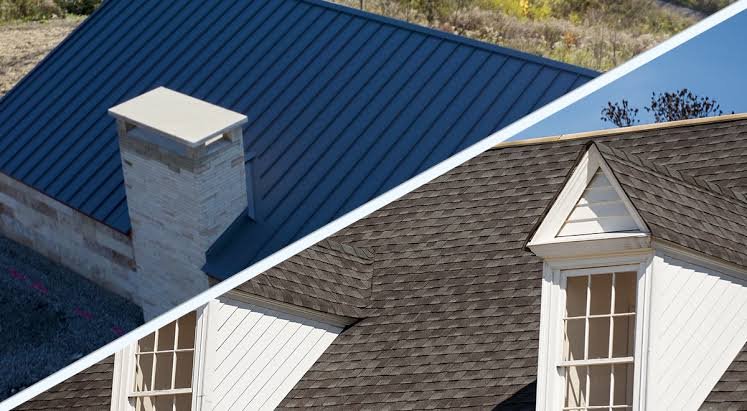
  • Metal Roofing vs Asphalt Shingles: Which Wins?

    Metal Roofing vs Asphalt Shingles: Which Wins?

    Introduction

    The metal roofing vs asphalt shingles debate comes up constantly whenever someone’s planning a roof replacement or building fresh, and honestly, there’s no single right answer — it depends heavily on your budget, climate, and how long you plan to stay in the home. I’ve gone back and forth on this myself while helping a relative plan a farmhouse roof. What worked for that project wouldn’t necessarily suit a city apartment building. This guide breaks down the real differences so you can decide what actually fits your situation in 2026.


    1. Upfront Cost Comparison

    Cost is usually the first question, and the answer isn’t as simple as “one is cheaper.”

    Quick answer: Asphalt shingles generally cost less upfront than metal roofing, roughly ₹80-150 per square foot versus ₹200-400 for metal, though metal roofing often costs less over its lifetime due to durability and lower maintenance needs.

    2. Lifespan and Durability

    This is where the comparison gets interesting. Metal roofing tends to outlast asphalt shingles by a wide margin.

    • Metal roofing: typically lasts 40-50 years with proper maintenance
    • Asphalt shingles: usually last 15-20 years, shorter in extreme heat
    • Metal handles heavy monsoon rainfall better, resisting water absorption

    I’ve noticed people underestimate how much Indian summer heat affects asphalt shingles specifically — they can warp or degrade faster in regions with sustained high temperatures.

    3. Maintenance Requirements

    Neither roofing type is maintenance-free, but the frequency and type of upkeep differs quite a bit.

    Direct answer: Metal roofing generally requires less frequent maintenance than asphalt shingles, needing only occasional rust-prevention coating, while shingles need more regular inspection for cracking, curling, and granule loss over time.

    4. Performance in Indian Climate Conditions

    Picture a small business owner in Jaipur running a warehouse — she chose metal roofing specifically because of the extreme summer heat and occasional dust storms in the region. Metal reflects heat better and handles wind-driven debris without the granule loss shingles experience.

    • Metal roofing: better heat reflection, reducing indoor cooling costs
    • Asphalt shingles: adequate for moderate climates, less ideal for extreme heat zones
    • Both need proper installation to handle monsoon rainfall effectively

    5. Noise During Rainfall

    This gets overlooked constantly, but it matters more than people expect. Metal roofing without proper insulation can be noticeably loud during heavy monsoon rain.

    • Add insulation layers under metal roofing to reduce rain noise significantly
    • Asphalt shingles naturally muffle rain sound better without extra insulation

    Has this ever bothered you during a heavy downpour — a roof so loud you can’t hear the TV? Worth factoring in if you’re considering metal.

    6. Environmental Impact

    Metal roofing is generally more recyclable at end-of-life compared to asphalt shingles, which typically end up in landfills. If sustainability matters to your decision, metal has a clear edge here. [link to related eco-friendly cleaning products guide here]

    7. Aesthetic and Property Style Considerations

    This one’s subjective, but worth mentioning. Metal roofing suits industrial, farmhouse, or modern architectural styles particularly well. Asphalt shingles blend more naturally with traditional residential aesthetics in most Indian cities.

    • Metal comes in various finishes and colors, including tile-look options now
    • Shingles offer more traditional, textured visual appeal for standard homes

    8. Installation Complexity and Timeline

    Metal roofing installation generally requires more specialized labor and slightly longer installation time compared to asphalt shingles, which most local contractors are already familiar with.

    • Metal roofing: 1-2 weeks for average residential installation
    • Asphalt shingles: often completed within 3-7 days depending on roof size

    Frequently Asked Questions

    Q1: Which lasts longer, metal roofing or asphalt shingles? Metal roofing typically lasts 40-50 years, roughly double the 15-20 year lifespan of standard asphalt shingles.

    Q2: Is metal roofing worth the higher upfront cost? For long-term homeowners, often yes — the extended lifespan and lower maintenance can offset the higher initial investment over time.

    Q3: Does metal roofing make homes hotter in summer? Not if properly insulated — in fact, metal reflects heat better than shingles when combined with adequate insulation underneath.

    Q4: Is metal roofing noisy during monsoon rain? It can be without proper insulation, though adding an insulation layer significantly reduces the noise during heavy rainfall.

    Q5: Which option is better for extreme heat regions in India? Metal roofing generally performs better in extreme heat, resisting warping and reflecting more sunlight than asphalt shingles.

    Q6: Can I switch from asphalt shingles to metal roofing during a renovation? Yes, though it typically requires additional structural assessment and slightly higher installation cost compared to a like-for-like replacement.


    Conclusion

    The metal roofing vs asphalt shingles decision really comes down to how long you’re planning to stay, your climate, and your upfront budget. If you want lower initial cost and don’t mind replacing sooner, shingles work fine. If you’re building for the long term and can afford the upfront investment, metal roofing pays off over the decades. Get quotes for both before deciding — the price gap sometimes narrows once you factor in long-term maintenance costs.


    Suggested Image Alt Text:

    1. “Metal roofing installed on a modern farmhouse in India”
    2. “Asphalt shingle roof on a residential home”
    3. “Comparison of metal roofing and shingle roofing materials”
  • Signs You Need a Roof Replacement, Not a Repair

    Signs You Need a Roof Replacement, Not a Repair

    Introduction

    Every homeowner eventually asks the same question during monsoon season — do I repair this leak again, or is it time to just replace the whole roof? I get why people hesitate. Replacement costs far more upfront than another patch job. But there are genuine signs you need a roof replacement, and ignoring them usually means paying for repairs repeatedly while the underlying problem keeps growing. This guide covers what actually indicates replacement time, versus what’s still fixable with a standard repair in 2026.


    1. Repeated Leaks in the Same Area

    If you’ve patched the same spot more than twice, that’s rarely a coincidence. It usually means the underlying structure has weakened beyond what surface repairs can fix.

    Quick answer: Repeated leaks in the same location, despite multiple repairs, are one of the clearest signs you need a roof replacement — it typically indicates structural deterioration underneath that surface patching can’t resolve.

    2. Visible Sagging

    A roof should be flat and even, not curved or dipping in the middle. Sagging usually means water damage has weakened the support structure underneath.

    I’ve noticed people mistake mild sagging for just “old construction settling.” That’s rarely true. Genuine sagging is a structural warning sign, not a cosmetic quirk.

    3. Age of the Roof

    Most roofing materials have a realistic lifespan, and once you’re past it, repairs become a losing game — patching one weak spot just reveals another nearby.

    • Concrete roofs (common in India): typically last 25-30 years with proper waterproofing
    • Metal roofing: usually 20-25 years depending on material quality
    • Asphalt shingle roofs: generally 15-20 years, shorter in extreme heat

    Direct answer: If your roof is approaching or past its expected material lifespan and showing multiple issues simultaneously, replacement is usually more cost-effective long-term than continuing repeated repairs.

    4. Widespread Cracking, Not Isolated Cracks

    A few hairline cracks here and there are normal and fixable. Widespread cracking across the roof surface, though, points to a deeper problem with the waterproofing membrane or underlying material. [link to related plumbing problems guide here]

    Picture a small business owner in Jaipur who kept patching individual cracks on her terrace roof every monsoon for three years. Eventually a proper inspection revealed the entire waterproofing membrane had failed — replacement ended up cheaper than another year of patchwork repairs.

    5. Water Stains Spreading Across the Ceiling

    Isolated water stains might indicate a single, fixable leak. Stains spreading across multiple areas of the ceiling suggest the water’s traveling — meaning the damage source is harder to pinpoint and likely more extensive than it appears.

    • Track stain patterns over a few weeks to see if they’re spreading
    • Multiple stain locations often mean multiple failure points

    6. High Energy Bills From Poor Insulation

    Roofing issues don’t just cause leaks — they affect insulation too. If your cooling bills have crept up noticeably without other explanation, a deteriorating roof might be the reason.

    Has this ever happened to you — an unexplained jump in your electricity bill during summer? Roof insulation failure is worth checking before assuming it’s just the weather.

    7. Missing or Damaged Tiles/Shingles

    For homes with tile or shingle roofing, missing or cracked pieces expose the underlying structure to water damage. A few missing tiles are repairable; widespread damage across large sections usually isn’t worth patching individually.

    • Inspect after major storms for dislodged or cracked tiles
    • Replace missing tiles promptly to prevent underlying damage

    8. Mold or Moss Growth

    Persistent mold or moss growth, especially in shaded areas of the roof, indicates trapped moisture that isn’t drying out properly. This often means the waterproofing has broken down beyond surface-level repair.


    Frequently Asked Questions

    Q1: How much does a full roof replacement cost in India? Costs vary widely by material and roof size, but typically range from ₹150-₹400 per square foot depending on roofing type and complexity.

    Q2: Can I repair a roof myself instead of hiring a professional? Minor tasks like sealing small cracks can be DIY, but structural assessment and full waterproofing work should go to professionals.

    Q3: How do I know if it’s a repair or replacement situation? If issues are isolated and the roof is within its expected lifespan, repair usually suffices. Multiple, recurring problems suggest replacement.

    Q4: How long does a roof replacement typically take? Most residential roof replacements take 1-3 weeks depending on size, material, and weather conditions during the project.

    Q5: Should I replace my roof before or after monsoon season? Before, ideally — completing replacement work before monsoon prevents water damage during the actual construction period.

    Q6: Does roof replacement affect home resale value? Yes, positively — a newer roof is a significant selling point and often recovers a good portion of its cost at resale.


    Conclusion

    Recognizing the real signs you need a roof replacement early saves you from years of repeated, increasingly expensive patch jobs. If you’re seeing recurring leaks, sagging, or widespread cracking, it’s worth getting a proper structural inspection rather than another quick fix. Book an inspection before the next monsoon season hits — catching this now is far cheaper than dealing with it during active rainfall.


    Suggested Image Alt Text:

    1. “Cracked roof surface showing signs of water damage”
    2. “Sagging roof structure indicating need for replacement”
    3. “Roofing contractor inspecting damaged tiles before repair decision”
  • How to Increase Your Home’s Resale Value Before Listing

    How to Increase Your Home’s Resale Value Before Listing

    Introduction

    Sellers often think a higher asking price is just about market timing. It’s not, or at least not entirely. How you present the property before listing plays a bigger role than most people expect. I’ve watched two nearly identical flats in the same building sell for noticeably different prices, purely because one owner spent a few weeks on prep work and the other didn’t bother. If you’re wondering how to increase home resale value without a full renovation, this guide covers what actually moves the needle — and what’s a waste of money before a sale.


    1. Fix Visible Damage First

    Buyers notice cracks, damp patches, and peeling paint immediately, and it colors their impression of everything else in the home, even if the issues are minor.

    Quick answer: Fixing visible cosmetic damage — cracks, damp patches, chipped paint — before listing can increase home resale value significantly, since buyers often mentally deduct far more than the actual repair cost when they spot neglect.

    2. Repaint With Neutral Colors

    I’ve noticed sellers sometimes keep bold, personal color choices right up to listing day. Buyers struggle to picture their own furniture and style in a space with strong personal colors. Neutral tones photograph better and appeal to a wider range of buyers.

    • Soft greys, warm whites, and muted beiges work best
    • Repainting typically costs ₹15,000-₹30,000 for a mid-sized home
    • Focus on high-visibility areas first: living room, main bedroom

    3. Deep Clean Everything

    This sounds too simple to matter, but it genuinely changes buyer perception. A spotless home feels newer and better maintained than it actually might be. [link to related spring cleaning checklist here]

    Direct answer: A thorough deep clean before listing — including windows, grout, and often-ignored corners — can influence buyer perception more than many buyers realize, sometimes adding perceived value worth far more than the cleaning cost itself.

    4. Address Kitchen and Bathroom Wear

    These two rooms influence buying decisions disproportionately. You don’t need a full renovation — small updates go a long way. [link to related kitchen renovation cost guide here]

    • Replace worn cabinet hardware and fix loose hinges
    • Re-caulk bathroom edges and replace old, stained fixtures
    • Fix any dripping taps before showings begin

    5. Improve Curb Appeal

    First impressions start at the entrance, not inside the home. Picture a small business owner in Jaipur who repainted her main door and added simple potted plants near the entrance before listing — buyers commented on the “welcoming feel” in almost every viewing.

    • Repaint or polish the main door
    • Fix broken nameplates, doorbells, or gate hardware
    • Add a few low-maintenance plants near the entrance

    6. Declutter and Depersonalize

    Personal photos, excess furniture, and clutter make it harder for buyers to imagine themselves living there. Has this ever crossed your mind while house-hunting yourself — struggling to picture a space full of someone else’s belongings?

    • Remove excess furniture to make rooms feel larger
    • Store away personal photos and highly specific decor
    • Organize closets and storage areas — buyers do look inside

    7. Fix Small Functional Issues

    Loose door handles, squeaky hinges, flickering lights — these small things quietly signal neglect, even when the core structure is fine.

    • Tighten and oil all door and cabinet hinges
    • Replace any non-functioning light bulbs or switches
    • Fix minor plumbing issues like slow drains

    8. Get a Pre-Listing Inspection

    Knowing about issues before a buyer’s inspector finds them gives you control over the narrative and negotiation. Fixing problems proactively often costs less than the price reduction a buyer will demand after finding them independently.

    • Identify structural or plumbing concerns early
    • Address anything that could become a negotiation point later
    • Consider getting minor certifications or reports ready in advance

    Frequently Asked Questions

    Q1: What adds the most resale value before listing a home? Cosmetic fixes — fresh paint, deep cleaning, and kitchen/bathroom touch-ups — typically offer the best return relative to cost.

    Q2: Is it worth doing a full renovation before selling? Usually not. Full renovations rarely recoup their full cost at resale; targeted, smaller updates offer better returns.

    Q3: How much should I budget for pre-listing home improvements? Generally 1-3% of the property’s value covers most cosmetic improvements that meaningfully boost buyer interest.

    Q4: Does decluttering really affect sale price? Yes — decluttered, depersonalized homes tend to sell faster and often at better prices since buyers can envision themselves living there.

    Q5: Should I fix structural issues before listing, or disclose and let the buyer handle it? Fixing proactively usually results in a better sale price than disclosing and negotiating a price reduction instead.

    Q6: How long before listing should I start prepping the home? Ideally 4-6 weeks, giving enough time for repairs, painting, and deep cleaning without rushing the process.


    Conclusion

    You don’t need a massive renovation to meaningfully increase home resale value — small, targeted fixes consistently make the biggest difference. Start with visible damage, a fresh coat of paint, and a genuine deep clean, then move on to functional fixes in the kitchen and bathroom. Give yourself a few weeks before listing, and you’ll likely see the difference reflected in both interest and final sale price.


    Suggested Image Alt Text:

    1. “Freshly painted neutral living room before home listing”
    2. “Decluttered bedroom staged for home sale showing”
    3. “Repainted front door improving curb appeal before selling”
  • First-Time Home Buyer’s Guide: What You Need to Know

    First-Time Home Buyer’s Guide: What You Need to Know

    Introduction

    Buying your first home feels overwhelming mostly because nobody explains the actual process clearly — everyone just throws terms like “carpet area” and “stamp duty” at you and expects it to make sense. A proper first time home buyer guide should cut through that confusion, not add to it. I’ve watched friends go through this process, and the ones who did well weren’t necessarily the ones with the biggest budgets — they were the ones who understood what they were actually signing up for. This guide walks through what genuinely matters, in the order it actually matters, for buyers navigating the Indian real estate market in 2026.


    1. Get Your Finances Sorted Before House Hunting

    This sounds obvious, but people still start browsing listings before knowing what they can actually afford.

    Quick answer: Before house hunting, a first time home buyer should know their loan eligibility, down payment capacity (typically 10-20% of property value), and monthly EMI comfort zone — ideally not exceeding 40% of monthly income.

    2. Understand the Total Cost, Not Just the Property Price

    The sticker price is rarely the full picture. I’ve noticed a lot of first-time buyers get blindsided by additional costs that add up to 8-12% on top of the property value.

    • Stamp duty and registration: varies by state, typically 5-8%
    • GST on under-construction properties: usually 5% for non-affordable housing
    • Legal fees, brokerage, and interior costs: often overlooked entirely

    3. Decide Between Ready-to-Move vs Under-Construction

    This choice affects timeline, cost, and risk significantly. Ready-to-move properties cost more upfront but eliminate construction delay risk entirely. [link to related real estate resale value guide here]

    Direct answer: Ready-to-move properties typically cost 10-15% more than under-construction ones but eliminate delivery delay risk and GST charges, making them a safer choice for buyers who need to move in immediately.

    4. Verify Legal Documentation Thoroughly

    Picture a small business owner in Jaipur who almost bought a flat with an unclear title, discovered only because her lawyer flagged a pending litigation on the property during due diligence. This step gets rushed constantly, and it shouldn’t be.

    • Check the title deed and encumbrance certificate
    • Verify RERA registration for the project
    • Confirm approved building plans match what’s actually built

    5. Choose the Right Home Loan

    Not all loans are equal, and the lowest advertised interest rate isn’t always the best deal once you factor in processing fees and terms.

    • Compare processing fees across lenders (often 0.5-1% of loan amount)
    • Check prepayment penalties, especially for floating rate loans
    • Get pre-approval before finalizing a property to strengthen your negotiating position

    6. Location Matters More Than People Initially Think

    It’s tempting to prioritize the property itself over the neighborhood. Has this crossed your mind — a beautiful flat in a poorly connected area you’ll regret within a year?

    • Check proximity to workplace, schools, and daily essentials
    • Research future infrastructure development plans in the area
    • Visit the location at different times of day before deciding

    7. Don’t Skip the Home Inspection

    Even new construction can have issues. A basic inspection covering plumbing, electrical, and structural elements catches problems before they become your responsibility. [link to related common plumbing problems guide here]

    • Check water pressure and drainage during inspection
    • Test electrical outlets and switchboards throughout the unit
    • Look for cracks, dampness, or uneven flooring

    8. Factor in Ongoing Costs After Purchase

    The costs don’t stop at possession. Maintenance charges, property tax, and eventual renovation needs all add up over time. [link to related seasonal maintenance checklist here]

    • Monthly maintenance charges vary widely by society and amenities
    • Annual property tax depends on location and property size
    • Budget for basic furnishing and move-in costs separately

    Frequently Asked Questions

    Q1: How much down payment do I need as a first-time home buyer? Most lenders require 10-20% of the property value as down payment, with the remainder covered through a home loan.

    Q2: What government schemes help first-time home buyers in India? Various affordable housing schemes offer subsidies and tax benefits — check current eligibility criteria, as these are periodically updated.

    Q3: How long does the home buying process typically take? From property search to possession, it usually takes 2-4 months for ready-to-move properties, longer for under-construction ones.

    Q4: Should a first-time buyer choose a resale or new property? Both have trade-offs — resale properties often come with established infrastructure, while new properties offer modern amenities and warranties.

    Q5: What’s RERA and why does it matter? RERA (Real Estate Regulatory Authority) registration protects buyers by ensuring project transparency and accountability — always verify this before purchasing.

    Q6: Can I negotiate the price on a first home purchase? Yes, especially for resale properties or under-construction projects nearing completion — negotiation room varies by market conditions.


    Conclusion

    This first time home buyer guide comes down to a few core habits — know your finances first, verify everything legally, and don’t rush the decision based on emotion alone. Take your time with inspections and documentation, even if it feels slower than you’d like. A property you fully understand before signing is worth far more peace of mind than one you rushed into.

    This article provides general information and isn’t financial or legal advice — consult a qualified professional for guidance specific to your situation.


    Suggested Image Alt Text:

    1. “First-time home buyer reviewing property documents with agent”
    2. “Couple inspecting a new home before purchase decision”
    3. “Home loan paperwork and calculator for first-time buyers”
  • Best Vegetables to Grow in a Small Backyard Garden

    Best Vegetables to Grow in a Small Backyard Garden

    Introduction

    Everyone assumes you need a huge plot of land to grow your own vegetables. You really don’t. A small backyard vegetable garden, even a few pots on a terrace, can produce more than you’d expect if you pick the right plants. I started with four pots on a balcony a couple of years back, mostly out of curiosity, and ended up with more tomatoes than I knew what to do with. This guide covers vegetables that genuinely do well in limited space, without needing constant attention or expert-level gardening skills.


    1. Tomatoes — The Easiest Starting Point

    Tomatoes are forgiving, productive, and grow well in containers as small as 12-14 inches in diameter.

    Quick answer: Tomatoes are one of the best choices for a small backyard vegetable garden because they thrive in containers, need only 6 hours of sunlight daily, and produce continuously for months once established.

    I’ve noticed cherry tomato varieties do especially well in Indian home gardens — smaller, faster to fruit, and less fussy about soil quality than larger beefsteak varieties.

    2. Chillies and Peppers

    These take up very little space and are almost impossible to kill once established. A single chilli plant can produce for 8-10 months in the right climate.

    • Grow in pots as small as 8-10 inches
    • Water moderately — overwatering is the main risk, not underwatering
    • Harvest regularly to encourage continuous production

    3. Leafy Greens (Spinach, Methi, Coriander)

    These are the fastest-growing option for anyone impatient to see results. Most leafy greens are ready for harvest within 25-35 days of sowing.

    Direct answer: Leafy greens like spinach, methi, and coriander are ideal for small spaces because they grow in shallow containers, mature quickly within a month, and can be re-sown continuously for a steady harvest throughout the season.

    4. Brinjal (Eggplant)

    Brinjal does surprisingly well in containers and tolerates Indian summer heat better than many other vegetables. Picture a small business owner in Jaipur growing brinjal on her rooftop — despite peak summer temperatures, her plants kept producing with just regular watering and occasional feeding.

    • Needs a container at least 14-16 inches deep
    • Prefers full sun, at least 6-8 hours daily
    • Harvest when skin is glossy, before seeds harden

    5. Okra (Bhindi)

    Okra grows fast, tolerates heat well, and doesn’t need elaborate care. It’s one of the more forgiving vegetables for beginners in a backyard vegetable garden setup.

    • Sow directly into containers rather than transplanting seedlings
    • Harvest pods young — overripe okra turns fibrous and tough
    • Needs consistent watering during flowering stage

    6. Radishes for Quick Wins

    If you want something to show results fast, radishes are ready in as little as 25-30 days. They’re also genuinely easy to grow in shallow containers.

    Has this ever happened to you — planting something and losing patience before it’s even close to ready? Radishes solve that problem nicely.

    7. Beans (Cluster Beans or French Beans)

    Beans are a good vertical option if space is genuinely tight. Growing them along a trellis or fence saves ground space while still producing a decent yield. [link to related low maintenance garden guide here]

    • Vertical growing saves significant container space
    • Beans fix nitrogen in soil, benefiting nearby plants too
    • Harvest young for the best texture and flavor

    8. Herbs That Pair Well With Vegetables

    Basil, mint, and curry leaves grow well alongside vegetables and take up minimal space. They also help deter some common pests naturally.

    • Mint spreads aggressively — keep it in a separate container
    • Basil pairs particularly well with tomatoes, both in the garden and kitchen
    • Curry leaf plants take longer to establish but last for years once mature

    Frequently Asked Questions

    Q1: What vegetables grow best in containers for beginners? Tomatoes, chillies, and leafy greens are the most beginner-friendly, forgiving of minor watering or soil mistakes.

    Q2: How much sunlight does a backyard vegetable garden need? Most vegetables need at least 6 hours of direct sunlight daily; leafy greens can tolerate slightly less.

    Q3: Can I grow vegetables year-round in India? Depending on your region, yes — with seasonal rotation (summer crops, monsoon crops, winter crops) you can maintain continuous production.

    Q4: What’s the minimum space needed for a small vegetable garden? A few containers on a balcony or terrace, roughly 10-15 square feet, is enough to start growing several vegetables.

    Q5: Do I need special soil for a backyard vegetable garden? A mix of garden soil, compost, and coco peat works well for most vegetables and is easy to prepare at home.

    Q6: How often should I water a small vegetable garden? Most vegetables need watering every 1-2 days depending on weather, though leafy greens may need slightly more frequent watering.


    Conclusion

    You don’t need acres of land to start a productive backyard vegetable garden — a few well-chosen pots and consistent care go a long way. Start with something forgiving like tomatoes or chillies, get comfortable with the basics, then expand into leafy greens or beans once you’re confident. Pick two vegetables from this list and get them planted this week — you’ll likely be surprised how quickly things grow.


    Suggested Image Alt Text:

    1. “Cherry tomatoes growing in containers in a backyard vegetable garden”
    2. “Fresh chillies growing on a small potted plant”
    3. “Leafy greens like spinach and coriander in a home garden”
  • Low-Maintenance Garden Ideas for Busy Homeowners

    Low-Maintenance Garden Ideas for Busy Homeowners

    Introduction

    I used to think gardens weren’t for people with busy schedules — too much watering, too much weeding, too much guilt when plants died from neglect. Then I actually looked into low maintenance garden ideas and realized the problem wasn’t gardening itself, it was choosing the wrong plants and layout for a busy lifestyle. A garden doesn’t have to demand daily attention to look good. This guide covers practical choices — plants, layout, and small tricks — that hold up even when you don’t have time to fuss over them every evening in 2026.


    1. Choose Native and Drought-Tolerant Plants First

    This is the single biggest decision that determines how much work your garden needs going forward.

    Quick answer: Native and drought-tolerant plants require significantly less watering and care than exotic varieties, since they’re already adapted to local soil and climate conditions — making them the foundation of any low maintenance garden idea.

    • Succulents and cacti for sunny balconies or terraces
    • Marigolds and periwinkle for colorful, hardy ground cover
    • Money plant and areca palm for shaded indoor-outdoor spaces

    2. Group Plants by Water Needs

    I’ve noticed a lot of people plant based on looks alone, mixing thirsty plants with drought-tolerant ones in the same bed. That just means overwatering half of them or underwatering the rest. Grouping by water requirement makes watering schedules dramatically simpler.

    3. Install a Basic Drip Irrigation System

    This one change alone cuts weekly maintenance time significantly. Drip systems deliver water directly to roots, reducing both waste and the need for manual watering. [link to related plumbing basics guide here]

    Direct answer: A basic drip irrigation setup for a small home garden costs around ₹3,000-₹8,000 in India and can reduce manual watering time by 70-80%, making it one of the most effective low-maintenance garden upgrades available.

    4. Use Mulch to Reduce Weeding and Watering

    Mulch isn’t just decorative — it genuinely reduces the work involved in keeping a garden alive.

    • Suppresses weed growth significantly
    • Retains soil moisture, reducing watering frequency
    • Organic mulch (dried leaves, bark) improves soil health over time

    Picture a small business owner in Jaipur who added a mulch layer to her small terrace garden last summer — she went from watering daily to every third day, without any visible decline in plant health.

    5. Go Vertical for Small Spaces

    Vertical gardens take up less ground space and are often easier to maintain than sprawling ground-level beds, especially for apartment balconies.

    • Wall-mounted planters keep plants at eye level for easy monitoring
    • Hanging pots work well for trailing plants like money plant or pothos
    • Reduces bending and kneeling maintenance work considerably

    6. Choose Perennials Over Annuals

    Annuals need replanting every season. Perennials come back year after year with minimal replanting effort — a genuinely smart trade-off for anyone short on time.

    Has this ever happened to you — replanting the same flower bed every few months, only for it to need replacing again shortly after? Perennials solve exactly that cycle.

    7. Add Hardscaping to Reduce Planted Area

    Not every part of a garden needs to be planted. Gravel paths, stone patios, and decorative rocks fill space beautifully without requiring any maintenance at all.

    • Gravel or stone pathways reduce lawn area needing mowing
    • Decorative rocks add visual interest with zero upkeep
    • Wooden decking works well for small terrace gardens

    8. Automate What You Can

    Smart irrigation timers connected to drip systems mean watering happens even when you forget or you’re traveling. [link to related smart home upgrades guide here]

    • Basic irrigation timers cost ₹1,500-₹4,000
    • Set schedules based on season, adjusting for monsoon automatically on some models
    • Combine with drought-tolerant plants for a nearly self-sufficient setup

    Frequently Asked Questions

    Q1: What are the easiest plants for a low maintenance garden in India? Succulents, marigolds, money plant, and areca palm are reliable choices that tolerate irregular watering and minimal care.

    Q2: How much time does a low-maintenance garden actually need weekly? With the right plants and irrigation setup, 30-45 minutes weekly is usually enough for a small to medium home garden.

    Q3: Is drip irrigation worth it for a small balcony garden? Yes, even for small spaces — it significantly reduces daily watering effort and prevents both over and under-watering.

    Q4: Do low-maintenance gardens still need seasonal attention? Some, yes — pre-monsoon and pre-summer checks help, but far less frequently than a high-maintenance flower garden.

    Q5: Can I create a low-maintenance garden on a budget? Absolutely. Native plants, basic mulch, and simple hardscaping keep costs low while reducing ongoing maintenance work.

    Q6: What’s the biggest mistake people make when trying to reduce garden maintenance? Mixing high-water and low-water plants together, which forces constant compromise on watering schedules for both.


    Conclusion

    Building a garden around low maintenance garden ideas isn’t about giving up on greenery — it’s about choosing plants and systems that don’t demand daily attention. Start with drought-tolerant plants, add mulch, and consider a basic drip system if your budget allows. A weekend spent setting this up properly saves you months of daily watering stress later.


    Suggested Image Alt Text:

    1. “Drought-tolerant succulents in a low maintenance garden setup”
    2. “Drip irrigation system installed in a small home garden”
    3. “Mulched garden bed reducing weeding and watering needs”
  • How to Prevent Frozen Pipes During Winter

    How to Prevent Frozen Pipes During Winter

    Introduction

    Frozen pipes aren’t something most of India worries about, but if you’re in Kashmir, Himachal, Ladakh, or parts of the northern hills, this is a genuinely real problem every winter. Knowing how to prevent frozen pipes winter damage isn’t optional there — a burst pipe in freezing temperatures can flood a home fast, and repairs during winter are expensive and slow. I’ve spoken to homeowners in Shimla who deal with this every year, and the ones who plan ahead barely notice winter as an issue. The ones who don’t usually regret it by January.


    1. Understand Why Pipes Freeze in the First Place

    Water expands when it freezes, and that expansion is what cracks pipes — not the ice itself sitting there quietly.

    Quick answer: Pipes freeze and burst because water expands roughly 9% in volume as it turns to ice, building pressure inside the pipe that eventually cracks it — this is the core reason winter pipe damage happens even in short cold spells.

    2. Insulate Exposed Pipes Before Winter Hits

    This is the single most effective step to prevent frozen pipes winter damage, and it’s genuinely simple to do yourself.

    • Use foam pipe insulation sleeves on exposed pipes (cost: ₹50-₹150 per meter)
    • Focus on pipes in unheated areas — basements, outdoor walls, attics
    • Don’t forget outdoor taps and hose connections

    I’ve noticed people insulate indoor pipes but completely skip outdoor taps, which are actually the most vulnerable.

    3. Let Taps Drip During Extreme Cold

    Sounds wasteful, but a slow drip keeps water moving through the pipe, which makes freezing much less likely. [link to related common plumbing problems guide here]

    Direct answer: Letting taps drip slightly during extreme cold keeps water flowing through pipes, reducing pressure buildup and making it significantly harder for the water inside to freeze completely.

    4. Keep Indoor Temperatures Consistent

    Picture a small business owner in Jaipur who travels to Manali for winter tourism season — she keeps her home heating on a low, consistent setting even when away, rather than turning it off completely. This alone has kept her pipes from freezing for three winters straight.

    • Maintain indoor temperature above 10°C even when away
    • Open cabinet doors under sinks to let warm air reach pipes
    • Avoid turning heating off completely during multi-day absences

    5. Seal Gaps and Drafts Near Pipes

    Cold air sneaking in through small gaps around pipe entry points speeds up freezing considerably. Simple sealant work here makes a real difference.

    • Seal gaps around pipes entering the house from outside
    • Check for drafts near water meters and outdoor connections
    • Weatherstrip doors and windows near plumbing areas

    6. Disconnect and Drain Outdoor Hoses

    Outdoor hoses left connected trap water that freezes and expands, sometimes damaging the outdoor tap itself. Has this happened to you before — a cracked outdoor tap you didn’t notice until spring?

    • Disconnect garden hoses before the first cold spell
    • Drain remaining water from outdoor taps completely
    • Cover outdoor taps with insulated covers if available

    7. Know the Warning Signs of a Frozen Pipe

    Catching this early prevents a small problem from becoming a flooded room. [link to related home maintenance mistakes guide here]

    • No water flow from a specific tap, but others work fine
    • Visible frost on exposed pipe sections
    • Strange smells from drains (frozen pipes can push sewer gas back)

    8. What to Do If a Pipe Freezes Anyway

    • Turn off the main water supply immediately if you suspect a freeze
    • Apply gentle heat with a hairdryer on low setting — never a direct flame
    • Call a plumber immediately if you notice any bulging or cracking

    Frequently Asked Questions

    Q1: At what temperature do pipes typically freeze? Pipes are at risk once temperatures drop below 0°C for extended periods, especially in poorly insulated or exposed areas.

    Q2: Which parts of India need to worry about frozen pipes? Mainly hill regions and higher-altitude areas — Kashmir, Himachal Pradesh, Ladakh, and parts of Uttarakhand during peak winter months.

    Q3: Does letting taps drip waste a lot of water? Minimally. A slow drip uses far less water than the cost and damage from a burst pipe repair.

    Q4: How much does pipe insulation typically cost? Basic foam insulation runs ₹50-₹150 per meter, making it one of the cheapest preventive measures available.

    Q5: Can frozen pipes burst even if I don’t see visible cracks immediately? Yes — cracks sometimes only become obvious once the ice thaws and water starts flowing again, revealing the leak.

    Q6: Should I turn off my water supply completely during winter if I’m away? For extended absences in cold regions, yes — combined with draining the system, this is the safest approach.


    Conclusion

    Taking steps to prevent frozen pipes winter damage doesn’t require major renovation — insulation, consistent heating, and a few sealed gaps cover most of the risk. If you’re in a colder part of India, don’t wait until the first hard freeze to start prepping. A weekend spent insulating exposed pipes now saves you a much colder, wetter problem later.


    Suggested Image Alt Text:

    1. “Foam insulation wrapped around exposed outdoor water pipe”
    2. “Homeowner checking pipes for frost during winter”
    3. “Outdoor tap disconnected and drained before winter freeze”
  • Common Plumbing Problems Every Homeowner Should Fix

    Common Plumbing Problems Every Homeowner Should Fix

    Introduction

    Plumbing issues have a habit of showing up at the worst possible time — right before guests arrive, or late on a Sunday when no plumber’s picking up the phone. Most common plumbing problems, though, aren’t actually complicated once you know what’s causing them. I’ve fixed a fair share myself over the years, sometimes successfully, sometimes not. This guide covers what you can realistically handle yourself, and what’s worth calling a professional for, so you’re not caught off guard the next time something starts dripping.


    1. Dripping Taps

    This is probably the most common plumbing complaint in any home, and usually the easiest to fix. A worn-out washer inside the tap is almost always the culprit.

    Quick answer: Dripping taps are typically caused by a worn rubber washer inside the tap valve — replacing it costs under ₹100 in parts and takes about 15 minutes, making it one of the easiest common plumbing problems to fix yourself.

    2. Clogged Drains

    Kitchen and bathroom drains clog for different reasons — grease and food particles in the kitchen, hair and soap scum in the bathroom.

    I’ve noticed people reach for chemical drain cleaners way too quickly. They work, sometimes, but they’re harsh on old pipes. A simple plunger or a wire hanger often does the job just as well without the corrosion risk.

    • Kitchen drains: avoid pouring oil or grease down the sink
    • Bathroom drains: clean the hair trap weekly to prevent buildup
    • For stubborn clogs, a mix of baking soda and hot water works surprisingly well

    3. Running Toilets

    A toilet that keeps running after flushing wastes a genuinely surprising amount of water — and money — over a month. [link to related maintenance mistakes guide here]

    Direct answer: A running toilet is usually caused by a faulty flapper valve that doesn’t seal properly, letting water continuously leak into the bowl — replacement flappers cost ₹150-₹400 and are simple to install without professional help.

    4. Low Water Pressure

    Picture a small business owner in Jaipur running a home-based salon — low water pressure in the wash basin was slowing down her entire client schedule. Turned out to be a clogged aerator, cleaned out in under ten minutes.

    • Check and clean tap aerators first — often the simplest fix
    • If pressure’s low throughout the house, it could be a supply line issue
    • Older pipes with mineral buildup may need professional descaling

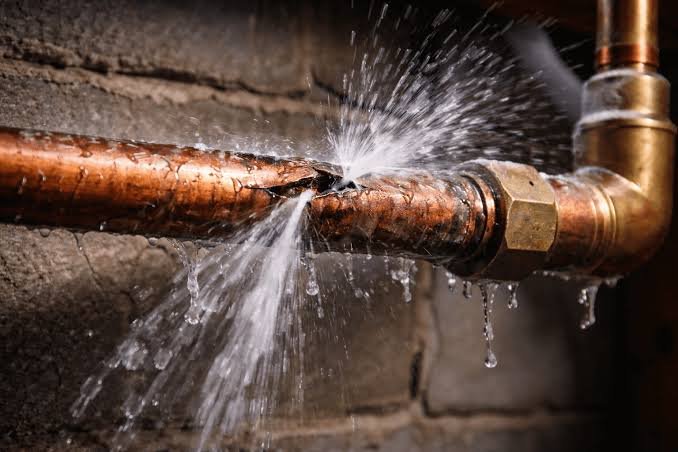
    5. Leaking Pipes

    This is where things get more serious. Small leaks behind walls or under sinks can go unnoticed until real damage appears. [link to related home maintenance mistakes guide here]

    • Check under-sink pipes monthly for dampness or discoloration
    • Wrap a temporary leak with pipe tape as a short-term fix, not a permanent one
    • Get exposed leaking pipes professionally repaired promptly — delays get expensive

    6. Water Heater/Geyser Issues

    Sediment buildup inside geysers is one of the more overlooked common plumbing problems, especially in areas with hard water. It reduces efficiency and can shorten the unit’s lifespan significantly.

    Has this ever happened to you — water taking forever to heat up despite the geyser running? That’s often sediment insulating the heating element. Annual flushing helps.

    7. Sewer Line Backups

    This is one problem you shouldn’t attempt yourself. Slow drains throughout the house, gurgling sounds, or bad odors from multiple drains at once usually point to a sewer line issue that needs professional equipment.

    • Multiple slow drains simultaneously: likely a main line issue
    • Persistent bad odor from drains: get it inspected before it worsens
    • Don’t ignore gurgling sounds — they’re an early warning sign

    8. Toilet Clogs

    Different from running toilets, actual clogs need a slightly different approach. A good plunger handles most cases; a plumbing snake works for stubborn ones.

    • Avoid flushing wet wipes, even ones labeled “flushable” — they rarely break down properly
    • Keep a plunger accessible in every bathroom, not just one

    Frequently Asked Questions

    Q1: What’s the most common plumbing problem in homes? Dripping taps and clogged drains are by far the most frequent issues homeowners deal with regularly.

    Q2: Can I fix plumbing problems myself, or should I always call a plumber? Simple issues like dripping taps, clogged drains, and running toilets are DIY-friendly. Sewer backups and major pipe leaks need professionals.

    Q3: How much does a typical plumbing repair cost in India? Minor repairs range from ₹200-₹1,000, while more complex issues like pipe replacement can run ₹3,000-₹15,000 depending on scope.

    Q4: How can I prevent common plumbing problems before they start? Regular maintenance — cleaning drain traps, checking for slow leaks, and flushing geysers annually — prevents most common issues.

    Q5: What tools should every homeowner keep for basic plumbing fixes? A plunger, adjustable wrench, plumber’s tape, and a basic drain snake cover most minor plumbing situations.

    Q6: When should I call a professional plumber immediately? For sewer backups, major leaks, or any issue involving multiple fixtures at once — these often indicate bigger underlying problems.


    Conclusion

    Most common plumbing problems aren’t emergencies if you catch them early and know the basics. Keep a few simple tools handy, don’t ignore small leaks or slow drains, and know when a problem’s beyond DIY territory. Next time a tap starts dripping, give it a shot yourself before calling anyone — you might save both time and money.


    Suggested Image Alt Text:

    1. “Homeowner fixing a dripping tap with a wrench”
    2. “Clogged bathroom drain being cleared with a plunger”
    3. “Plumber inspecting pipes for common plumbing problems”